We will learn about data-driven components in this article. React components that access external or dynamic data are known as data-driven components. We developed a timeline component in the previous article. The Header element will now be changed so that it can be used for other purposes and become a data-driven component. Using attributes or properties on a component, React enables us to transmit data to a component using the same syntax as HTML. This is comparable to passing an image tag's src attribute. We may think of the img /> tag's attribute as a prop we're setting on a component called img. We may access these properties from within a component through this.props. This will be implemented in our header component as following
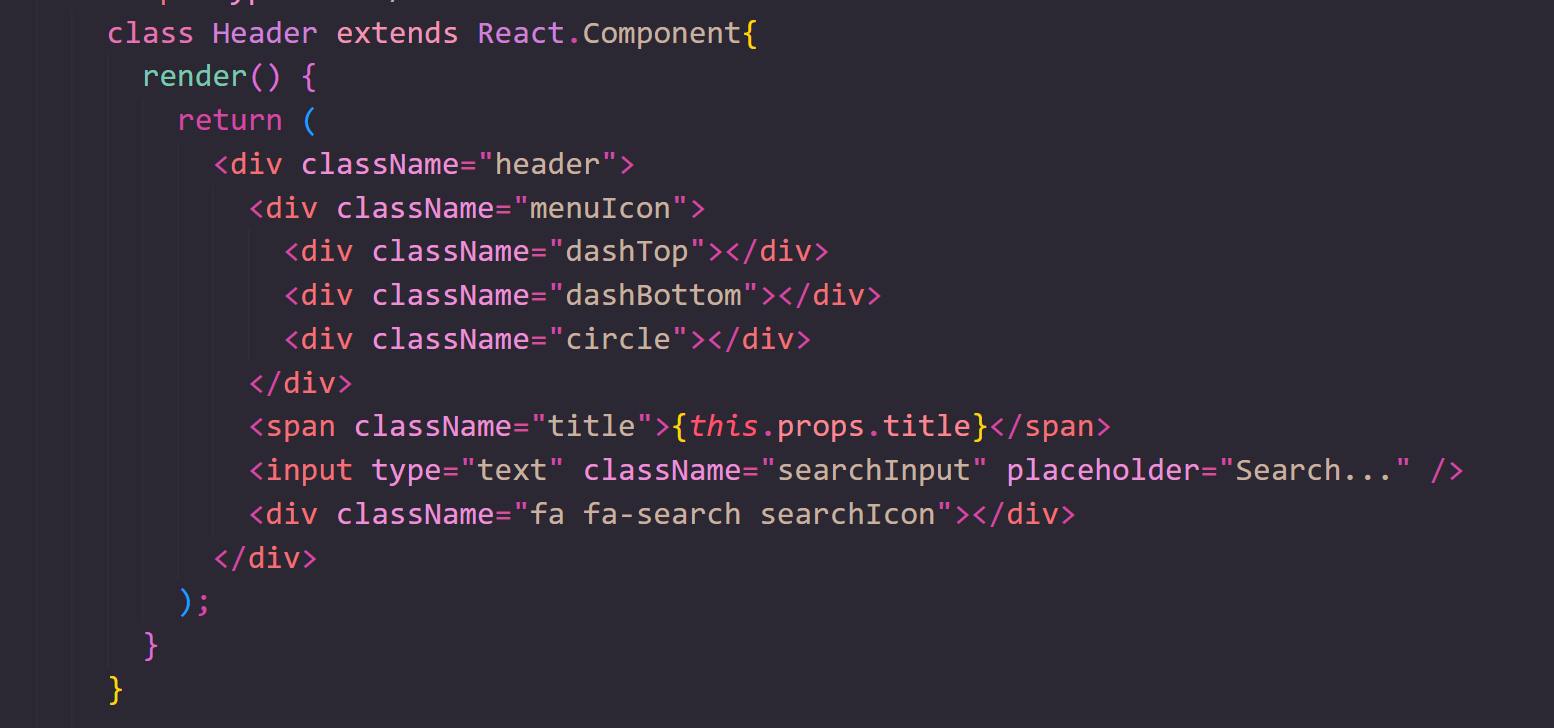
Now, if we provide the code a property or some props, it will display the header with that title.
In a component, we can pass in more than just strings. We can pass numbers, strings, various objects, and even functions. We may do the same with the content component-

We can then use this new content by passing in an object as a prop instead of a hard-coded string. The object to use the above mentioned template would be like so-
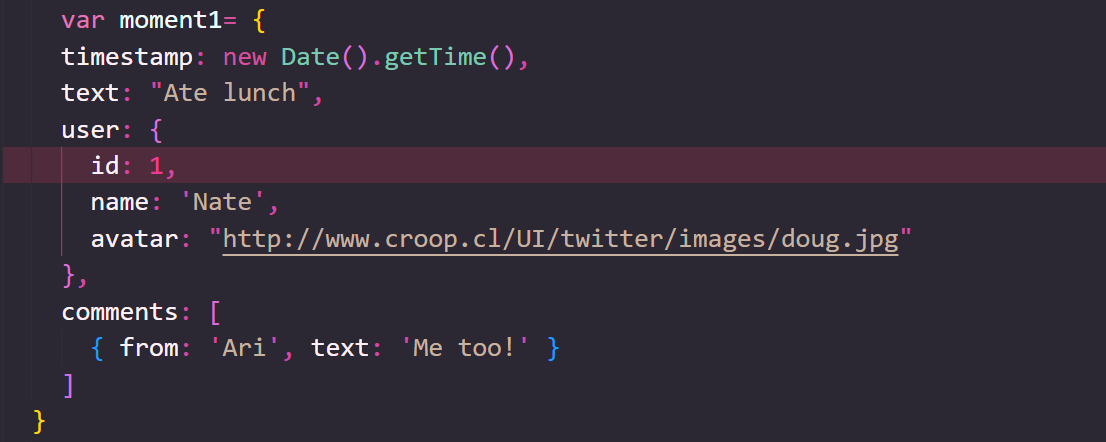
We can then use this new content by passing in an object as a prop instead of a hard-coded string. For instance-
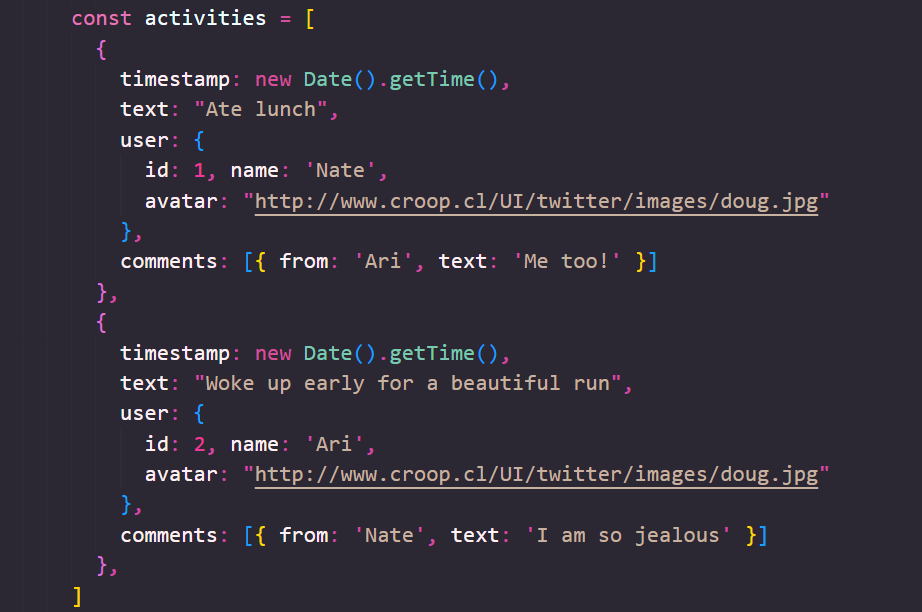
We would have to repeat this if we wanted to incorporate multiple timeline elements. We could pass the component an array of objects instead of to doing this. The component of activities would be as follows
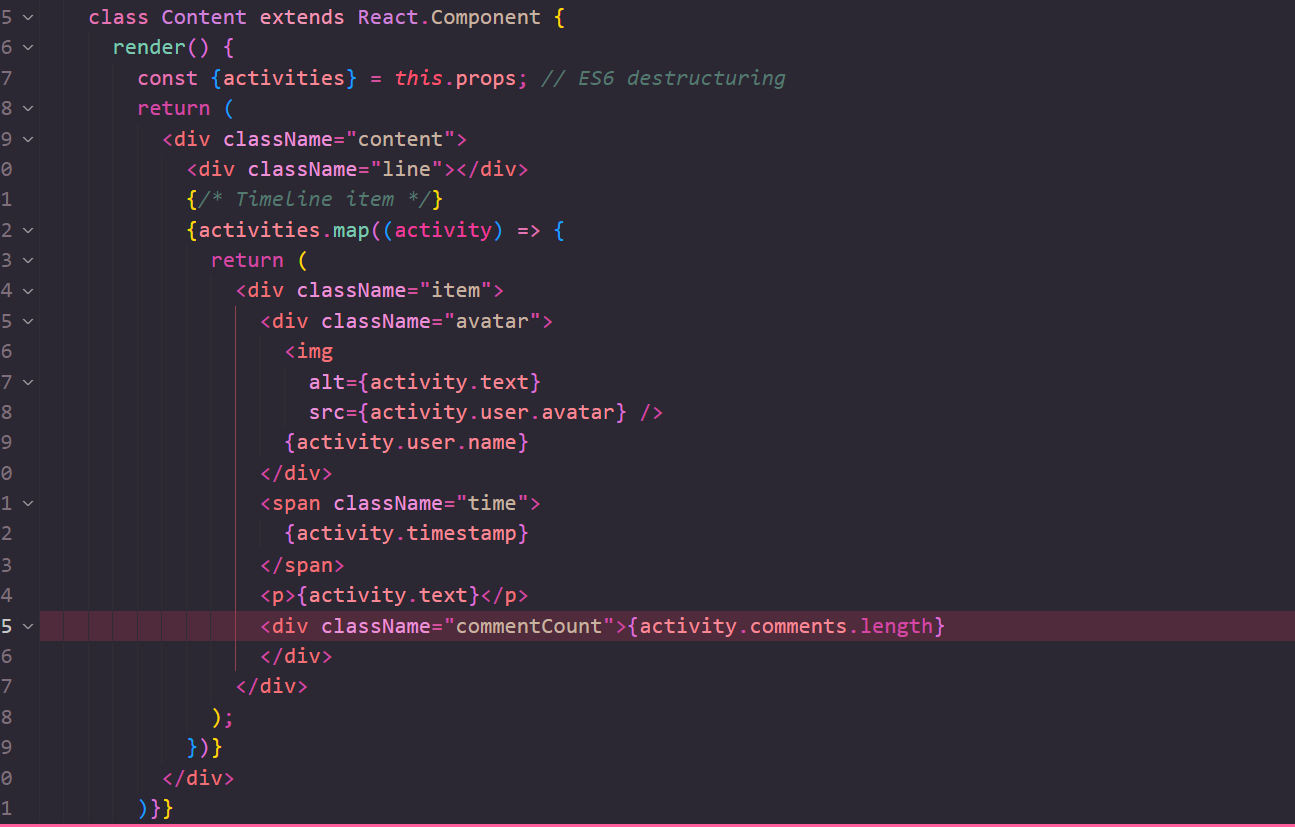
the component would need to be updated as below-:
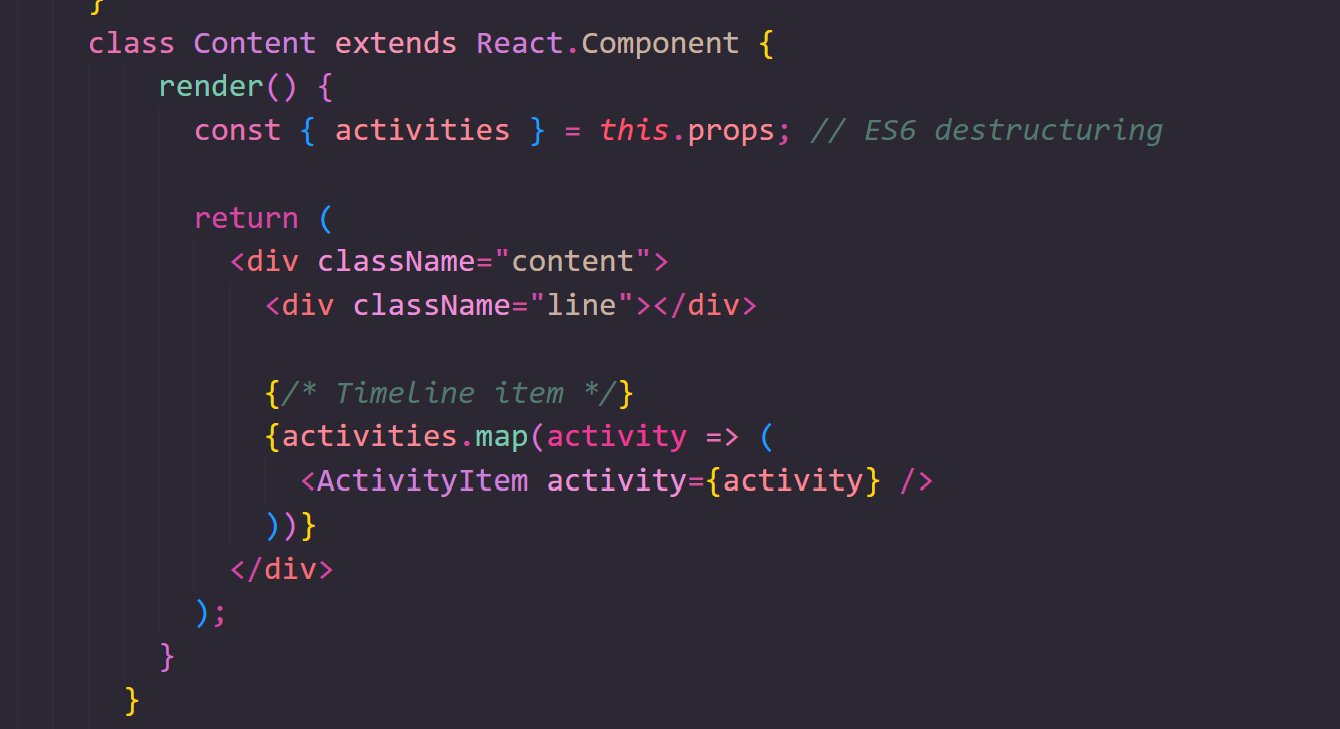
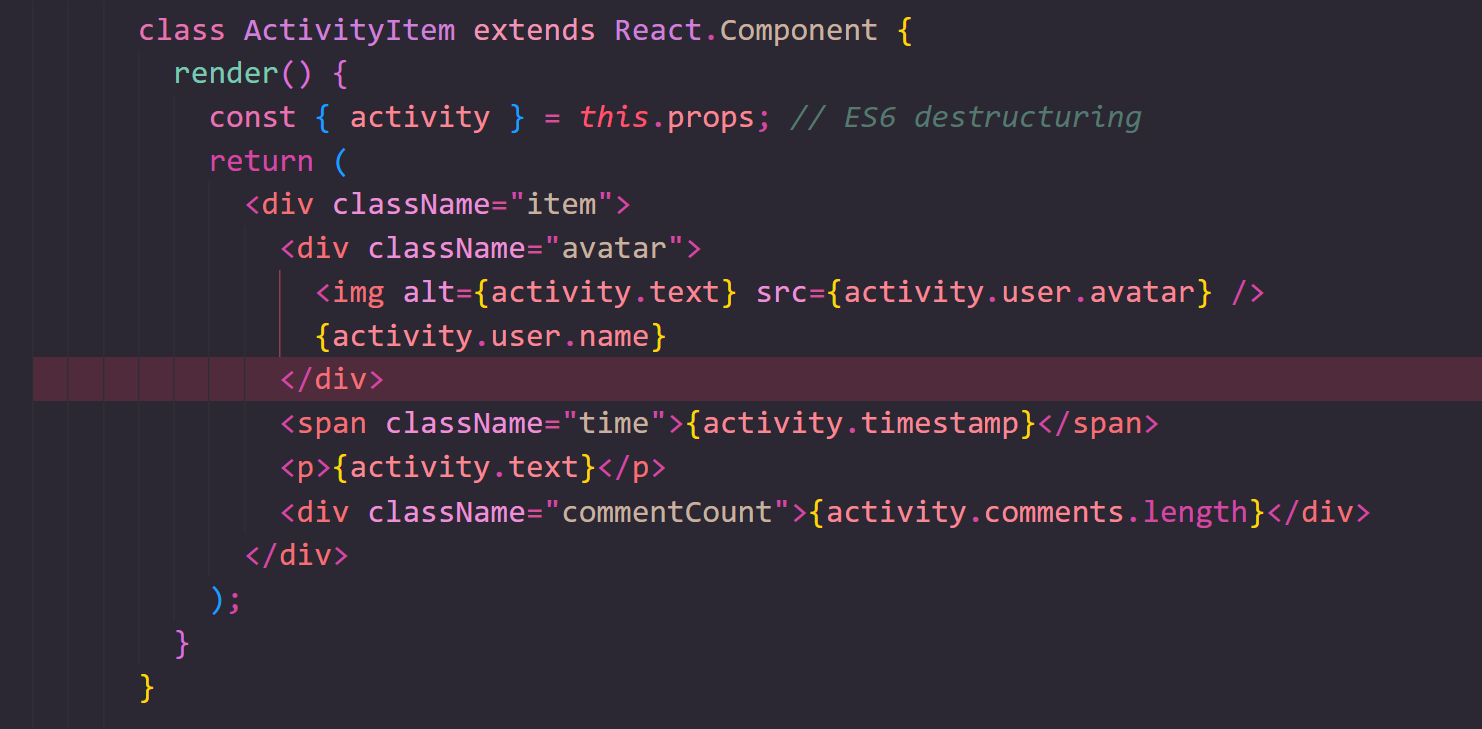
Rather than creating a complex Content component, we can move the. At this point, it seems appropriate to develop one more component to contain a single activity item. Additionally, this will facilitate testing, adding functionality, etc.
To display a list of ActivityItems, let's modify our Content component and create an activityitem component.
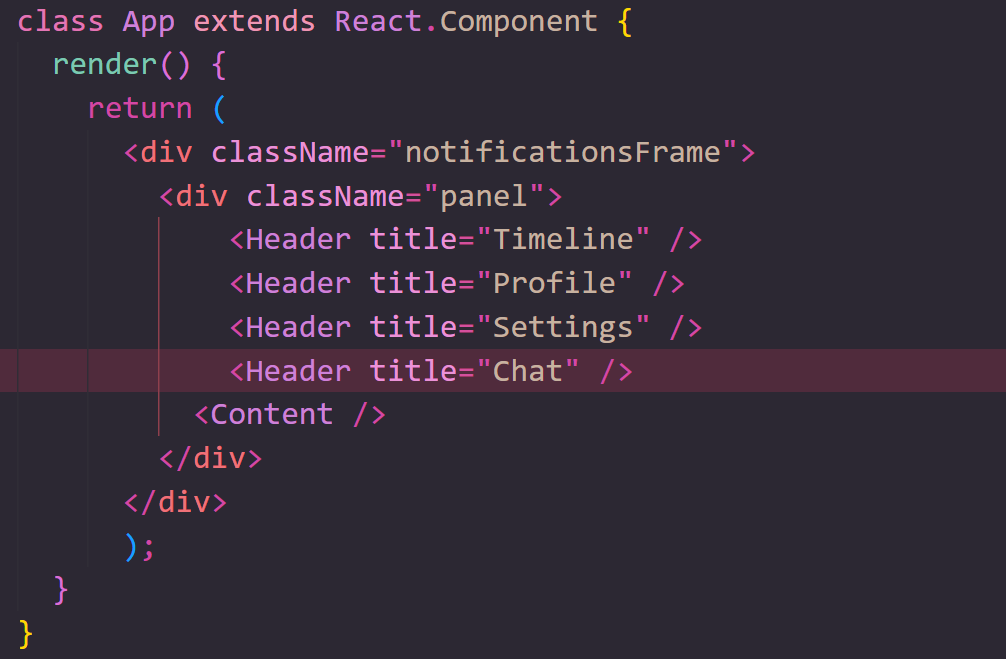
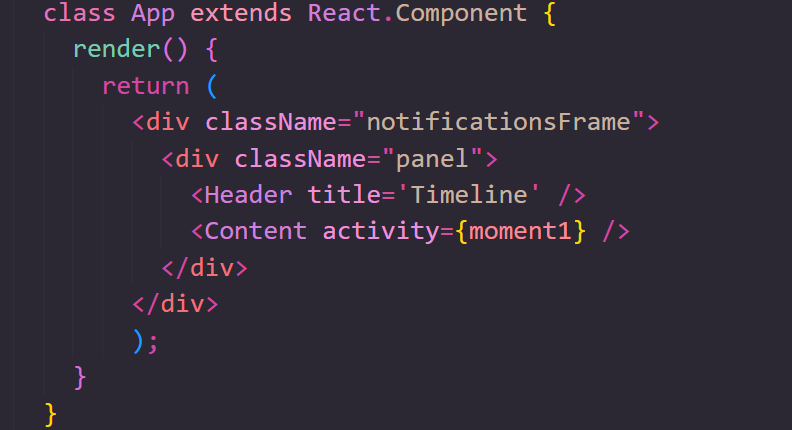
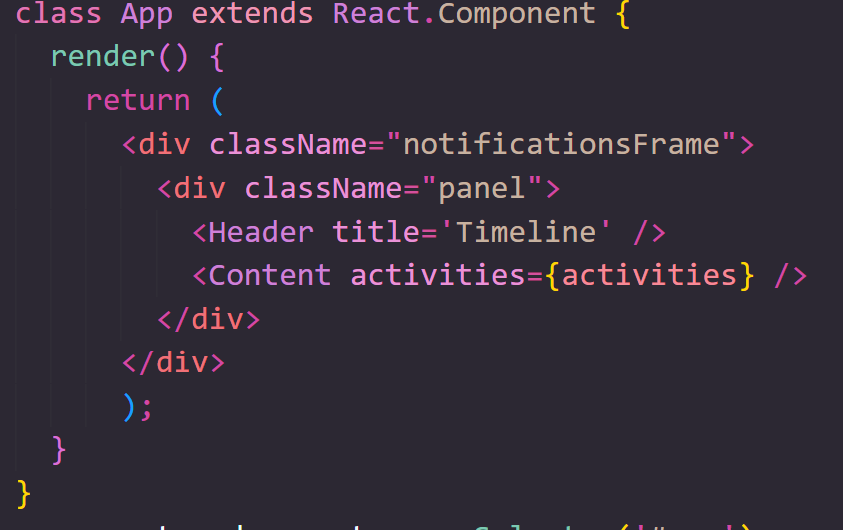
This is how the app class would be defined-
 We'll develop state components,
lifecycle hooks, and proptypes in the next article. The complete code is available on my
github.
« Read Previous== Article in this
Series
Read Next Article in this Series »
We'll develop state components,
lifecycle hooks, and proptypes in the next article. The complete code is available on my
github.
« Read Previous== Article in this
Series
Read Next Article in this Series »